POS Settings
The Point of Sale (POS) Settings section allows system administrators to configure and manage all POS-related functionalities in Centric System. These settings ensure that sales operations, payments, accounting entries, receipts, and customer support integrations are properly aligned with the business requirements.
This documentation provides a detailed explanation of each subsection available under POS settings.
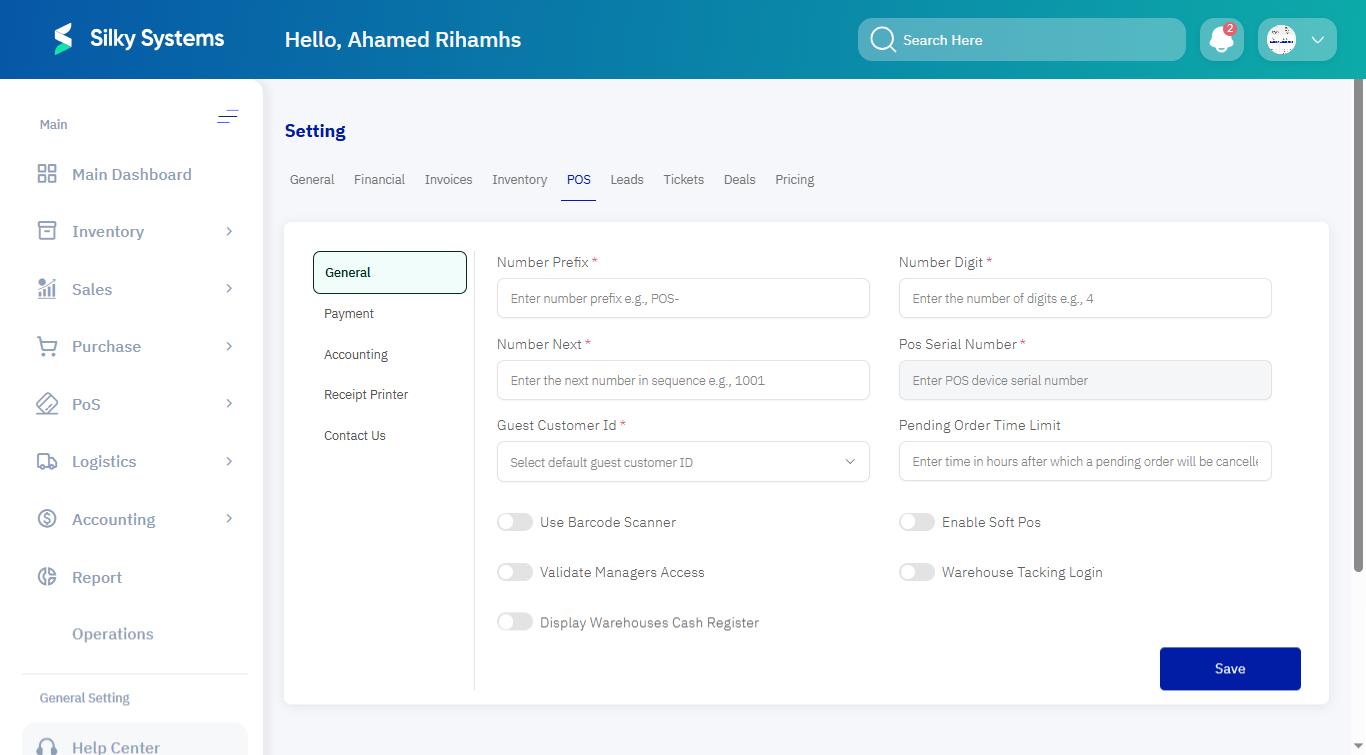
General
Overview
The General tab under POS settings defines numbering formats, device registration, and basic cashier permissions for Point of Sale operations. This ensures transactions are uniquely numbered, linked to a terminal, and controlled according to business rules.
How to Access
- From the left navigation menu, select Settings.
- Click on POS.
- Choose the General tab.
Detailed Sections
- Number Prefix → Prefix applied to POS invoice numbers to distinguish them from other transactions. Example:
POS-. - Number Digit → Sets the number of digits for invoice numbers. The system pads numbers with zeros if needed. Example:
4results inPOS-0001. - Number Next → Defines the next sequential number that will be used. Example:
1001. - POS Serial Number → Registers the POS terminal with a unique serial identifier for device tracking. Example:
SN-A1B2C3. - Guest Customer ID → Assigns a default customer for walk-in or guest sales. Example:
Guest Customer. - Pending Order Time Limit → Sets the time limit (in hours) after which pending orders will automatically be cancelled. Example:
24. - Use Barcode Scanner → Allows scanning items directly into the POS system.
- Enable Soft POS → Activates software-based POS functionality without physical terminals.
- Validate Managers Access → Requires manager confirmation for protected actions.
- Warehouse Tracking Login → Ensures warehouse activities are logged when using POS.
- Display Warehouses Cash Register → Displays warehouse registers for monitoring cash activity.
Final Step
Click Save to confirm changes. All new POS transactions will reflect these updated settings.
Payment
Overview
The Payment tab configures how payment methods link with accounting records and defines permissions for cashier operations.

How to Access
- From the left navigation menu, select Settings.
- Click on POS.
- Choose the Payment tab.
Detailed Sections
- Cash Account Id → Selects the ledger account used for cash receipts. Example:
acc1. - Cash Payment Method → Defines how cash transactions are recorded. Example:
Cash. - Card Account Id → Selects the ledger account for card payments. Example:
acc1. - Card Payment Method → Sets the method used for card-based transactions. Example:
Bank Transfer. - Bank Transfer Accounts Id → Ledger account for transfer payments. Example:
acc1. - Payment Transfer Method → Specifies the type of payment method linked with transfers. Example:
Cash. - StcPay Client Code → Enables StcPay integration using a unique code. Example:
7200203349778888. - Allow Cashier to Override Sale Price in POS → Determines if cashiers can manually adjust sale prices. Example:
EnabledorDisabled.
Final Step
Click Save to apply. All future POS payments will post according to the configured accounts and methods.
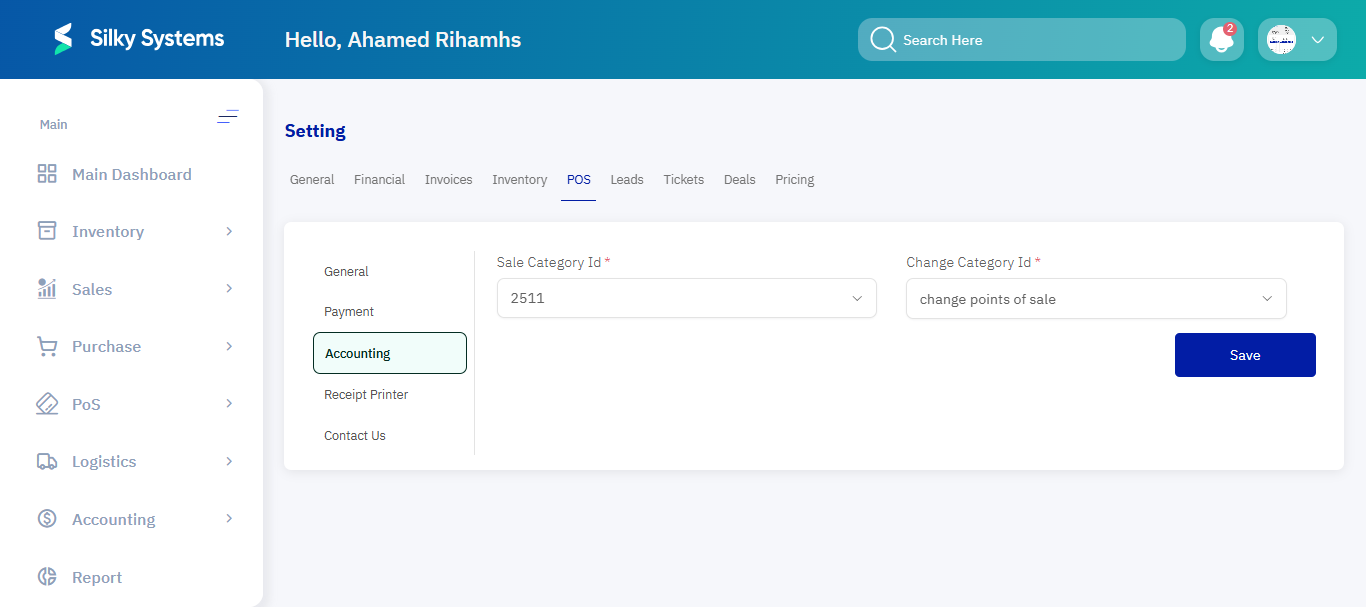
Accounting
Overview
The Accounting tab manages how POS transactions integrate with the financial system by defining posting categories.
How to Access
- From the left navigation menu, select Settings.
- Click on POS.
- Choose the Accounting tab.
Detailed Sections
- Sale Category ID → Determines which category POS sales will be posted under in the ledger. Example:
2511. - Change Category ID → Defines the accounting category for cash change given back to customers. Example:
Change Points of Sale.
Final Step
Click Save to confirm. All POS sales and changes will now be reflected under the assigned accounting categories.
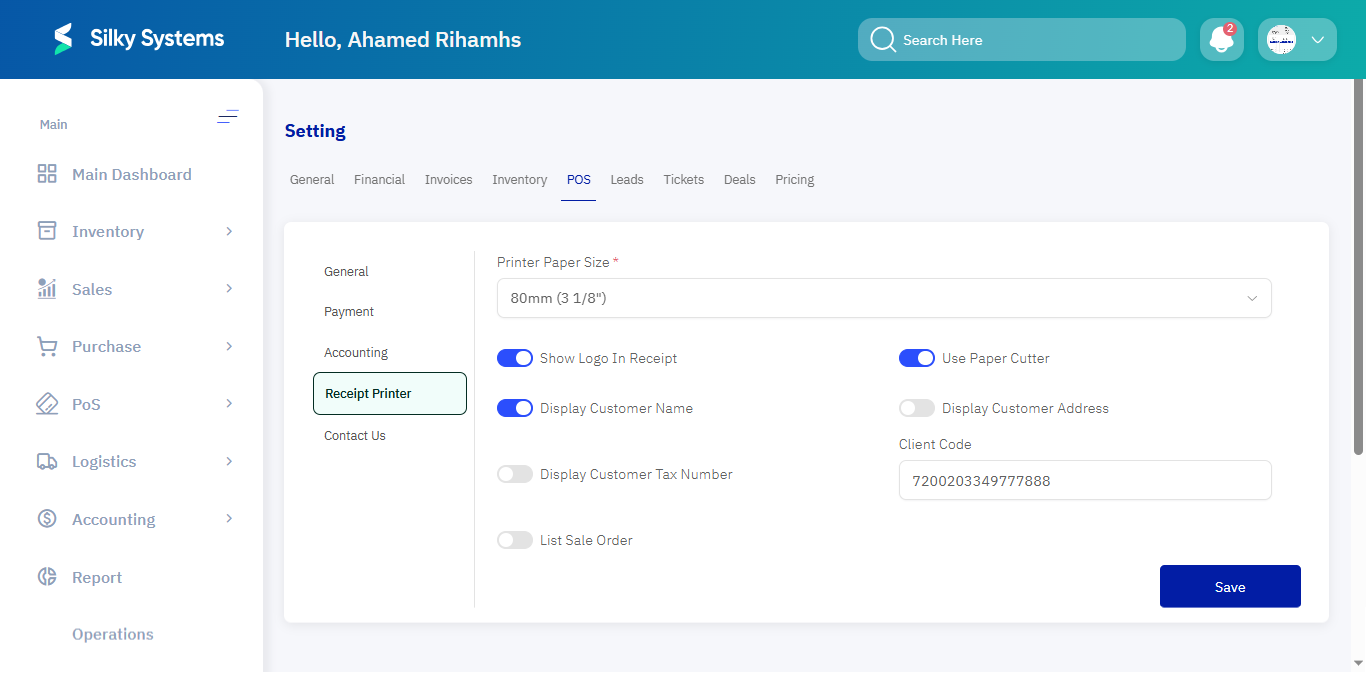
Receipt Printer
Overview
The Receipt Printer tab configures how receipts are generated and printed for customers.
How to Access
- From the left navigation menu, select Settings.
- Click on POS.
- Choose the Receipt Printer tab.
Detailed Sections
- Printer Paper Size → Selects the paper roll size for receipts. Example:
80mm (3 1/8"). - Show Logo in Receipt → Prints the company logo at the top of the receipt.
- Use Paper Cutter → Automatically cuts receipts if the printer supports it.
- Display Customer Name → Prints the customer’s name on receipts when available.
- Display Customer Address → Adds the customer’s address to receipts.
- Display Customer Tax Number → Prints the customer’s VAT/Tax number if provided.
- List Sale Order → Prints a detailed sales order layout.
- Client Code → Provides a code used for integrations or customization. Example:
7200203349778888.
Final Step
Click Save. Receipt formatting and content will be applied to all POS printers.
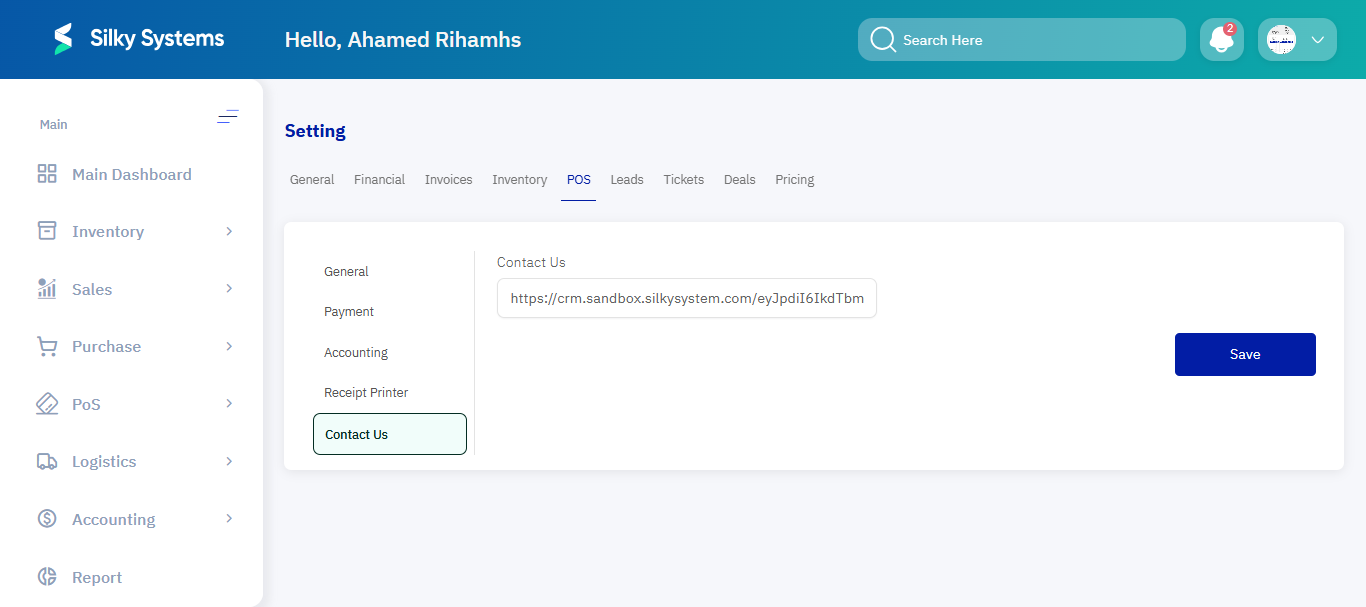
Contact Us
Overview
The Contact Us tab provides a link to the CRM or support portal where users can request technical assistance.
How to Access
- From the left navigation menu, select Settings.
- Click on POS.
- Choose the Contact Us tab.
Detailed Sections
- Contact Us → Stores the URL link to the CRM/helpdesk system. Example:
https://crm.sandbox.silkysystem.com/....
Final Step
Click Save. The contact link will be accessible within POS for quick support access.
Best Practices
- Always assign a Guest Customer to streamline walk-in transactions.
- Use Manager Validation for sensitive operations like price overrides.
- Monitor the Number Next field regularly to avoid invoice duplication.
- Test printing after updating Receipt Printer settings to ensure correct formatting.
Final Step
Once all POS settings are configured, run a test transaction including a sale, payment, and receipt to validate that accounting entries, permissions, and outputs work as intended.